OVERVIEW
This post looks at how to create a Django 3 project app and incorporate Bootstrap 4 files into it. This also looks at how to setup the folders for putting static assets like images, css files etc. There are different explanations given in various places on the web depending on the version of Django being used. This post gives the steps on making the above configuration work successfully . This post assumes that you are using a Linux OS but the steps will be applicable to other OS with minor changes. We are using Python3 here.
1.CREATE PROJECT
In the folder where you want to create the project type django-admin startproject myproject . This will create the project structure. Change current folder to myproject . The directory structure should look something like this:
.
├── manage.py
└── myproject
├── asgi.py
├── init.py
├── settings.py
├── urls.py
└── wsgi.py
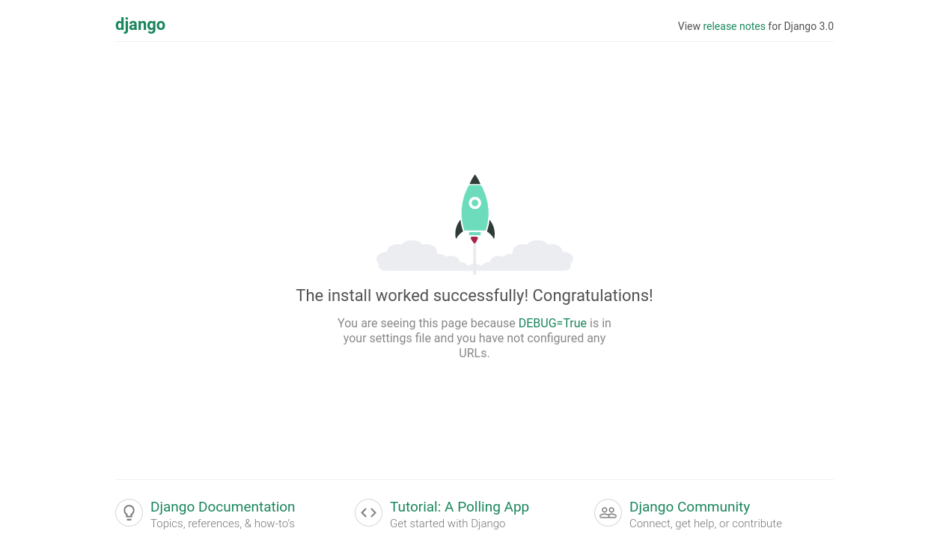
To test the created site, type python3 manage.py runserver
On opening http://localhost:8000 you should see the following:

2.CREATE APP
We will now create an app within the project. Staying in the project directory (myproject) type python3 manage.py startapp myapp
The directory structure should be something like this now:
├── db.sqlite3
├── manage.py
├── myapp
│ ├── admin.py
│ ├── apps.py
│ ├── init.py
│ ├── migrations
│ │ └── init.py
│ ├── models.py
│ ├── tests.py
│ └── views.py
└── myproject
├── asgi.py
├── init.py
├── pycache
│ ├── init.cpython-36.pyc
│ ├── settings.cpython-36.pyc
│ ├── urls.cpython-36.pyc
│ └── wsgi.cpython-36.pyc
├── settings.py
├── urls.py
└── wsgi.py
3.CREATE VIEWS
We will now create a couple of views for display. Open myapp/views.py and add the following code to it:
from django.shortcuts import render
from django.http import HttpResponse

# Create your views here.

def index(request):
    return HttpResponse("Home page")

def details(request):
    return HttpResponse("Details page")
Create a urls.py in the myapp folder to handle url redirection. This file will then be called in the urls.py within mysite. Put the following code into myapp/urls.py:
from django.urls import path
from . import views

urlpatterns = [
        path('', views.index, name="index"),
        path('details/', views.details, name="details"),
        ]
In mysite/urls.py add the following code:
from django.urls import path
from . import views

urlpatterns = [
        path('', views.index, name="index"),
        path('details/', views.details, name="details"),
        ]
4.SETUP BOOTSTRAP
Type pip3 install django-bootstrap4 to install Bootstrap4 into the django installation
In mysite/settings.py, add bootstrap4 to the list of INSTALLED_APPS
5.CREATE TEMPLATES WITH HTML FILES
Now we will use HTML files to generate views. First create a folder called templates under myapp . Create another folder called myapp under templates. So now the folder structure will be myapp/templates/myapp
We have two views to generate – index and details. We will create a separate header and footer template which we can use in the other pages. Create another folder components under myapp . So the folder will be myapp/templates/myapp/components
Under components folder create a file header.html and add the following script:
<html>
<head><title></title>
{% load bootstrap4 %}
{% bootstrap_css %}
{% bootstrap_javascript jquery='full'%}

</head>
Create another file called footer.html and add the following script:
<hr>
<div class="row">
	<div class="col-sm-12 text-center small">Footer comes here</div>
</div>
</html>
Under templates/myapp folder create index.html and add the following script:
{% include "myapp/components/header.html" %}

<body>
Homepage
<div class="container">
	<div class="row border">
		<div class="col-sm-3">Left col
		</div>
		<div class="col-sm-9">Right col</div>
	</div>
<div class="clearfix"></div>
</div>

{% include "myapp/components/footer.html" %}
Under templates/myapp folder create details.html and add the following script:
{% include "myapp/components/header.html" %}

<body>
Homepage
<div class="container">
	<div class="row border">
		<div class="col-sm-12 text-center">Details page</div>
	</div>
<div class="clearfix"></div>
</div>

{% include "myapp/components/footer.html" %}
Now we go back to myapp/views.py and change the code to use templates:
from django.shortcuts import render
from django.http import HttpResponse

# Create your views here.

def index(request):
    return render(request, "myapp/index.html")

def details(request):
    return render(request, "myapp/details.html")
We need to add the templates folder to mysite/settings.py :
TEMPLATES = [
    {
        'BACKEND': 'django.template.backends.django.DjangoTemplates',
        'DIRS': [
                '/var/www/myproject/myapp/templates',
            ],
Run the project again. You should see the following output for http://localhost:8000/myapp

And this page for http://localhost:8000/myapp/details

6.SETUP FOLDERS FOR STATIC ASSETS
Now we will setup the folder structure to put up our own assets like images, scripts etc.
Under myproject/myapp create a folder called static. Under static create three folders called css, img and js. It should look something like this:
static
├── css
├── img
└── js
Open myproject.settings.py and add the following settings:
STATIC_URL = '/static/'
STATICFILES_DIRS = [
    os.path.join(BASE_DIR, "myapp/static"),

]
Create a custom.css under static/css and add the following script:
body {background-color: #eeeeee; font-size:12px; min-height:800px;}
Create a test.js under static/js and add the following script:
alert("This is javascript");Add a sample image to static/img folder for testing. We will assume its called python-logo.png
Open myapp/header.html and update the script as below:
<html>
<head><title></title>
	{% load bootstrap4 %}
{% bootstrap_css %}
{% bootstrap_javascript jquery='full'%}
{% load static %}
<link rel="stylesheet" href="{% static "css/custom.css" %}" />
<script src="{% static "js/test.js" %}"></script>
</head>
Open myapp/index.html and update the script as follows:
{% include "polls/components/header.html" %}
{% load static %}

<body>
Homepage
<div class="container">
	<div class="row border">
		<div class="col-sm-3">
			<img src="{% static "img/python-logo.png" %}" class="img img-fluid">
		</div>
		<div class="col-sm-9"><h1>Right col</h1></div>
	</div>
<div class="clearfix"></div>
</div>

{% include "polls/components/footer.html" %}
Before running the app, do a migration with python3 manage.py migrate
Now run the app with http://localhost:8000/myapp . The output should be something like this:

CONCLUSION
The above steps enable your site to use Bootstrap and also put in place your own assets .
Leave a Reply