Jun 07

10 Most Popular FTP Clients

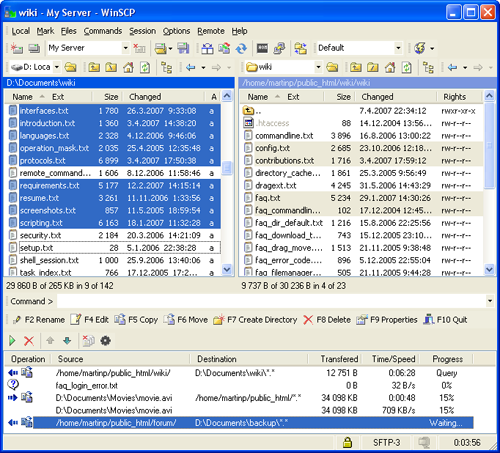
Well I just wanted to put out a small list of the best or the most used FTP Clients which I personally found worth mentioning. Don’t get me wrong… there are many more FTP Clients which I haven’t put up here …but since I had to choose from a pool of them… I came up with this short list of my personal BEST :) .

If you think there is some other Client worth adding to the list do let me know … I would appreciate the suggestion and the feedback.

Well I hope this list helps a few people in finding what they want when it comes to their file transfer needs or secure file transfers. Enjoy.


1. FileZilla – All platforms ( free )


2. SmartFTP – Windows ( free & paid )


3. FireFTP – All platforms with Firefox ( free )


4. WinSCP – Windows ( free )


5. Cyberduck – Mac & Windows ( free )


6. FlashFXP – Windows ( free & paid )


7. CuteFTP – Mac & Windows ( free & paid )


8. WS_FTP – Windows ( trial & paid )


9. GoFTP – All platforms ( free & paid )


10. CoffeeCup - Windows

Free FTP –  ( free )

Direct FTP( trial & paid )

Apr 16

55 of the best Icon Downloads on Deviantart 2011

I have been putting up many such similar lists which suggested the Best and the Latest sets of icon collections and many other such website links for others to check them out, without having to browse all over the web.

Now since I really felt that Deviantart is one of the best sites to find icon collections and much more such artistic creations, I decided to dedicate a full blog post just to let you guys know which icon-sets I found to be the <b>best</b>.

And the cool thing about this list that every single icon collection mentioned here is <b>Free to download</b> directly from their pages :)

So I hope you enjoy going through 55 of the most innovative and beautiful icon designs on Deviantart.
Have fun !!!

1. Albook extended 811 icons

2. Drink Web 2.0 Icon Pack

3. PixeloPhilia 32PX Icon Set

4. IconTexto Web 2.0 Inside

5. Twitter Icons TweetMyWeb 7

6. web 2 icon set

7. Paper feed icons

8. hydroxygen iconset

9. OnceAgain

10. MinIcons

11. Oxygen

12. isabi

13. Helix icons

14. Aeon

15. ALL ICONS pack “limewire”

16. Basic set

17. Realistic Icons Preview icons

18. 3D Cartoon Icons Pack III

19. Developpers Icons

20. Icon Set

21. Lucid Icons

22. iConPack now with psd

23. HP Dock Icon Set

24. Puck Icons Pack II

25. Yeti Box 2

26. Grzanka’s Icons

27. D-Squared

28. Devine Icons

29. Black and Blue Icons

30. Orb Icons Pack

31. Massive Media Icons Win

32. Christmas Icons 2007

33. Social Icons hand drawn

34. Token

35. Boolean 1 1

36. Onibari light

37. Sketched-up free iconset

38. facebook ui icons vector

39. ” ecqlipse 2 “

40. Leopar’d IconPackager

41. TextEdit

42. icon for transformers

43. Adobe CS3 full pack

44. Apple Mail Icons

45. AccBox

46. Windows Icons V1

47. ICON EverGreen

48. Remixed AddressBook Icons

49. Drop-Box Icon

50. Mailbox Icon

51. Yoritsuki icons

52. Concave Icons

53. Software Icons Pack

54. MP3 Players Icons

55. NeonX Icons

Apr 10

Top 50 Best Free & Paid Icon Sites

Previously I posted a short list of links for selected icon-sets or icon collections which had only those icon-sets which were in the corners of some website, but this time I thought I would post a long list of websites that have a huge extent of high quality diverse collections of icons :)

Here is a list of the best sites I have found over the Internet which have a great collection sets of icons.

The list does include the Free and Paid websites, but most of them are free.
I hope you enjoy feasting your eyes over these lovely collection of creative imagination and hard work :)
Have Fun !!!

P.S – The list is in alphabetical order, so try not to miss out on the ones listed at the bottom just because they haven’t been added at the start of the list.

1. 365psd.com – free


2. alturabit.com – free


3. bestfreeicons.com – free


4. bijusubhash.com – free


5. csscreme.com – free


6. designmoo.com – free


7. doublejdesign.co.uk – free


8. dryicons.com – free


9. fasticon.com – free


10. flashripper.net – free


11. freeiconsweb.com – free & paid


12. gosquared.com – free


13. blog.guifx.com – free


14. icofree.com – free


15. icojoy.com – free & icojoy.com – paid


16. iconbee.willmayo.com – free


17. icondrawer.com – free & paid


18. iconeasy.com – free


19. iconeden.com – free & iconeden.com paid


20. iconfever.com – free


21. iconpot.com – free


22. iconstick.com – free


23. iconbulk.com – free


24. icondock.com/free – free & icondock.com/icons – paid


25. iconfactory.com – free


26. icongalore.com – free & paid


27. iconshock.com – free & paid


28. iconspedia.com – free


29. iconzworld.com – free


30. instantshift.com – free


31. jordan-michael.com – free


32. juicyicons.com – free


33. icons.mysitemyway.com – free


34. photoshop.backata.com – free


35. psd.tutsplus.com – free


36. smashingmagazine.com – free


37. stockicons.com paid


38. studiotwentyeight.com – free


39. turbomilk.com – free


40. tutorial9.net – free


41. vecteezy.com – free


42. vistaicons.com – free


43. visualpharm.com – free


44. weloveicons.com – free


45. webiconset.com – free & paid


46. webappers.com – free


47. websiteicons.com – free & paid


48. websiteicons.net – free


49. wefunction.com – free


50. zeusboxstudio.com – free

And one more cute one which I don’t want to leave out is this is :)

famfamfam.com – free

Mar 27

List of Web-Browsers with download links & official websites

Well these are a few of the names and their respective links of certain web-browsers over the Internet which you can find and use according to your needs.
Most of the main ones you already know like Internet Explorer, Mozilla Firefox, Google Chrome, Opera, Safari and more.

Below we have a tabular format of information comprising of the browser’s name, developer/company links, download page links, current version available and what types of operating systems do each of them support.

Internet Explorer

Internet Explorer

- Windows

Mozilla Firefox

- click here to download version 4.0
- Windows, Mac OS, Linux, Maemo, Android, Nokia N900

Google Chrome

- click here to download version 10.0.648.151
- Windows, Mac OS, Linux

Opera

- click here to download version 11.01
- Windows, Mac OS, Linux, Android, iPhone, Tablets

Safari

- Windows, Mac OS

Netscape Navigator

- click here to download version 9.0.0.6
- Windows, Mac OS, Linux

Camino

- click here to download version 2.0.7
- Mac OS

Sea Monkey

- click here to download version 2.0.13
- Windows, Mac OS, Linux

K-meleon

- click here to download version 1.5.4
- Windows

Galeon

- click here to download version 2.0.2
- Linux

Konqueror

- click here to download version 4.6
- Mac OS, Linux

Maxthon browser

- click here to download version 3.21.1000
- Windows, Android

Flock browser

- click here to download version 2.6.1
- Windows, Mac OS, Linux

Lunascape

- click here to download version 6.4.4
- Windows

Amaya

- W3C
- click here to download version 11.3.1
- Windows, Mac OS, Linux

iCab

- click here to download version 4.8a
- Mac OS, iPhone, iPod Touch, iPad

Midori

- click here to download version 0.3.3
- Windows, Mac OS, Linux

Uzbl

- Uzbl
- Linux

RockMelt

- click here to download version 0.3.3
- Windows, Mac OS

Voyager

- click here to download version 3.3.125
- Others

Dillo Web Browser

- click here to download version 2.2
- Windows, Mac OS, Linux, *BSD, Solaris

Slim Browser

- click here to download version 5.01.023
- Windows

KidRocket

- KidRocket ( official site not available )
- click here to download version 1.5.0.2
- Windows

Epic Browser

- click here to download version 1.2
- Windows

Iron Browser

- click here to download version 10.0.650.0
- Windows

GNU IceCat

- click here to download version 3.6.9
- Mac OS, Linux

Comodo Dragon

- click here to download version 4.1.1.12
- Windows

OmniWeb

- click here to download version 5.10.3
- Mac OS

Crazy Browser

- click here to download version 3.05
- Windows

ShenzBrowser

- click here to download version 1.1
- Windows

Swiftweasel

- click here to download version 3.5.5
- Linux

Enigma Browser

- Windows

Kazehakase

- click here to download version 0.5.8
- Linux

Shiira

- Shiira Project ( official site not available )
- click here to download version 2.3
- Mac os

Avant Browser

- Windows

xB Browser

- click here to download version 3.9.10.24
- Windows

Sleipnir

- click here to download version 2.9.6
- Windows

Space time

- click here to download version 1.0
- Windows

Browse3D

- click here to download version 3.5
- Windows

3B Rooms

- 3B
- click here to download version 3.11
- Windows

Bitty Browser

- Windows

Lobo java Web Browser

- click here to download version 0.98.4
- Linux

Elinks text www Browser

- click here to download version 0.12
- Linux

Epiphany

- click here to download version 2.30.6
- Mac OS, Linux

Grail

- CNRI
- click here to download version 0.6
- Windows, Mac OS, Linux

Ibrowse

- click here to download version 2.4
- Other
Lynx
- click here to download version 2.8.7
- Windows, Mac OS, Linux

Iceweasel

- click here to download version 1.5.0.8
- Linux

Mozilla Minefield

- click here to download version 4.2
- Windows, Linux

NetSurf

- click here to download version 2.6
- RISC os, Linux, Unix, Haiku & BeOS, AmigaOS
Conkeror
- Windows, Unix/Linux, Debian & derivatives

Deepnet Explorer

- click here to download version 1.5.3
- Windows

PhaseOut

- click here to download version 5.4
- Windows

Wyzo

- click here to download version 3.6.4 (Windows) 3.5.6 (Mac)
- Windows, Mac OS

Zac Browser

- click here to download version 1.5
- Windows, Mac OS

Oregano

- RISC OS

Acoo Browser

- click here to download version 1.98.744
- Windows

Cayman Browser

- click here to download version 2.2
- Windows

GoSurf

- click here to download version 2.84.903.8452
- Windows

GreenBrowser

- click here to download version 5.8.0315
- Windows
Mar 17

Alter/change the width, height, skin and color of CKEditor

Well to change the color or height or width or even change the whole look (skin) of CKEditor , we just need to keep in mind 1 file, and that is the ” config.js ” file in the ckeditor folder.

Any changes made to the main config.js file will reflect on all the pages where the CKEditor has been used.
But if you don’t want the changes to show on all the pages then you only need to add some code in the respective pages where you want the changes to happen.

This code below will give you a nice idea about how to change the properties of your CKEditor using the config.js file
( code inside the config.js file is given below )


CKEDITOR.editorConfig = function( config )
{

// config.language = 'fr';                                                         
// config.customConfig = '/ckeditor/config.js';     
// config.toolbar = 'Basic';
// config.uiColor = '#dfe8f6';

config.height = 200;
config.width = 250;
config.skin = 'v2';      //config.skin = 'office2003'; 
                             //config.skin = 'kama';

CKEDITOR.config.toolbar_Basic = [
['Source','-','Templates'],
['Cut','Copy','Paste','PasteText','PasteFromWord','-','Print', 'SpellChecker', 'Scayt'],
['Undo','Redo','-','Find','Replace','-','SelectAll','RemoveFormat'],
['Checkbox', 'Radio', 'TextField', 'Textarea', 'Select', 'Button', 'ImageButton', 'HiddenField'],
'/',
['Bold','Italic','Underline','Strike','-','Subscript','Superscript'],
['NumberedList','BulletedList','-','Outdent','Indent','Blockquote'],
['JustifyLeft','JustifyCenter','JustifyRight','JustifyBlock'],
['Link','Unlink','Anchor'],
['Flash','Table','HorizontalRule','Smiley','SpecialChar','PageBreak'],
'/',
['Styles','Format','Font','FontSize'],
['TextColor','BGColor'],
['Maximize', 'ShowBlocks','-','About']
]
config.toolbar = 'Basic';
config.extraPlugins = "insert_image";
};

Below is the preview of the toolbar after making the above changes in the config file

After changes made in the config.js

Now let’s try changing only the color of the toolbar, for that you just have to write something like this in the config.js


// config.language = 'fr';
// config.customConfig = '/ckeditor/config.js';
   config.toolbar = 'Basic'; 
   config.uiColor = '#800040'; 
// config.height = 200;
// config.width = 250;
// config.skin = 'v2'; 

Now the toolbar will look something like this

Changed the color of the toolbar from the config.js

But if you don’t want the changes to be shown in every single page where you have used CKEditor then you have to write a few lines of code in the individual pages where you want to change the properties of your CKEditor.

In this case, I want the changes to show up only on one page called “test-editor.html”.

Case 1: changing the skin only

&lt;!DOCTYPE HTML PUBLIC "-//W3C//DTD HTML 4.0 strict//EN"&gt;
&lt;html&gt;
&lt;head&gt;
&lt;title&gt;Truelogic.org::TestEditor::CKEditor example &lt;/title&gt;

&lt;script type="text/javascript" src="ckeditor/ckeditor.js"&gt;&lt;/script&gt;
&lt;/head&gt;

&lt;body&gt;

  &lt;form name="" action="" method=""&gt;
   &lt;textarea id="txtDescrip" name="txtDescrip" cols="20" rows="5" class="ckeditor"&gt;&lt;/textarea&gt;

  &lt;script type="text/javascript"&gt;
    var editor = CKEDITOR.replace( 'txtDescrip',
    {
      toolbar : [
            ['Source','-','Templates'],
            ['Cut','Copy','Paste','PasteText','PasteFromWord','-','Print', 'SpellChecker', 'Scayt'],
            ['Undo','Redo','-','Find','Replace','-','SelectAll','RemoveFormat'],
            ['Checkbox', 'Radio', 'TextField', 'Textarea', 'Select', 'Button', 'ImageButton', 'HiddenField'],
            '/',
            ['Bold','Italic','Underline','Strike','-','Subscript','Superscript'],
            ['NumberedList','BulletedList','-','Outdent','Indent','Blockquote'],
            ['JustifyLeft','JustifyCenter','JustifyRight','JustifyBlock'],
            ['Link','Unlink','Anchor'],
            ['Flash','Table','HorizontalRule','Smiley','SpecialChar','PageBreak'],
            '/',
            ['Styles','Format','Font','FontSize'],
            ['TextColor','BGColor'],
            ['Maximize', 'ShowBlocks','-','About'],['insert_image']
          ],
      skin : 'office2003',  // ALTERED THE SKIN HERE 
    });
  &lt;/script&gt;

  &lt;/form&gt;
&lt;/body&gt;
&lt;/html&gt;

Case 2: changing the height, width and the color of the toolbar

&lt;!DOCTYPE HTML PUBLIC "-//W3C//DTD HTML 4.0 strict//EN"&gt; 
&lt;html&gt;
&lt;head&gt;
&lt;title&gt;Truelogic.org::TestEditor::CKEditor example &lt;/title&gt;

&lt;script type="text/javascript" src="ckeditor/ckeditor.js"&gt;&lt;/script&gt;
&lt;/head&gt;

&lt;body&gt;

  &lt;form name="" action="" method=""&gt;
   &lt;textarea id="txtDescrip" name="txtDescrip" cols="20" rows="5" class="ckeditor"&gt;&lt;/textarea&gt;

  &lt;script type="text/javascript"&gt;
    var editor = CKEDITOR.replace( 'txtDescrip',
    {
      toolbar : [
            ['Source','-','Templates'],
            ['Cut','Copy','Paste','PasteText','PasteFromWord','-','Print', 'SpellChecker', 'Scayt'],
            ['Undo','Redo','-','Find','Replace','-','SelectAll','RemoveFormat'],
            ['Checkbox', 'Radio', 'TextField', 'Textarea', 'Select', 'Button', 'ImageButton', 'HiddenField'],
            '/',
            ['Bold','Italic','Underline','Strike','-','Subscript','Superscript'],
            ['NumberedList','BulletedList','-','Outdent','Indent','Blockquote'],
            ['JustifyLeft','JustifyCenter','JustifyRight','JustifyBlock'],
            ['Link','Unlink','Anchor'],
            ['Flash','Table','HorizontalRule','Smiley','SpecialChar','PageBreak'],
            '/',
            ['Styles','Format','Font','FontSize'],
            ['TextColor','BGColor'],
            ['Maximize', 'ShowBlocks','-','About'],['insert_image']
          ],
      uiColor: 'red', 
      height: 200,
      width: 700,
    });
  &lt;/script&gt;

  &lt;/form&gt;
&lt;/body&gt;
&lt;/html&gt;

Mar 17

How to create a new toolbar plugin in CKEditor

Hey there, here is something which I learned the hard way while I was trying out my hands on customizing CKEdior for a website, in which I needed to add a new button which enabled the admin to add a particular kind of text or HTML tag in the textarea.

So therefore I thought I would share my experience through a simple step by step process of how I managed to achieve the customized feature of adding a new plugin (new button) in the CKEditor toolbar.

Well I just made a button which when clicked will add an image (in this case Truelogic.org Logo) in the textarea content.
Step 1: The basic directory structure of the CKEditor 3.3

( DO KEEP IN MIND THE VERSION OF THE CKEditor BEING USED HERE, DIFFERENT VERSIONS MAY HAVE DIFFERENT FOLDER/DIRECTORY STRUCTURE )

  ckeditor/
        config.js
        plugins/
             insert_image/
                    insert_image_button.png
                    plugin.js

Step 2: Now, as you may have an idea after seeing the folder structure that you have to create a new folder called “insert_image”, inside the plugins folder.

( IMPORTANT: Folder name is very important because the config.js recognizes the function of the plugin based on the folder name given )

Now the code which you have to paste after creating the “plugin.js” inside the “insert_image” folder is given below , this plugin code allows you to insert a predefined image inside the textarea (in this case Truelogic.org Logo)

(function(){
     //The Code is written here, which will be executed when the button is clicked
     var a= {
     exec:function(editor){
             CKEDITOR.instances.txtDescrip.insertHtml("&lt;img src='http://truelogic.org/simple/images/true.png' border=0 /&gt;");  
     //CKEDITOR.instances.ID OF THE TEXTAREA.insertHtml("IMAGE URL");
     //above line inserts an IMG tag with the predefined url of the image which points to the truelogic logo
              }
},

//The actual button is defined/created here and the associated code is linked with it
b='insert_image';
CKEDITOR.plugins.add(b,{
    init:function(editor){
    editor.addCommand(b,a); // associating the executable code with the button
    editor.ui.addButton('insert_image',{
                                     label:'Insert image',
                                     icon: this.path + 'insert_image_button.png',
                          //defining the path of the icon image which will be displayed on the toolbar for this button
                          //easiest would be to have the icon image in the same folder as the plugin.js

                                     command:b
                             });
   }
});
})();

Step 3:

Here is the “insert_image_button.png” image to make things easier for you guys

This image has to be put inside the “plugins/insert_image/” folder, next to the plugin.js

Step 4:
Here is the code which is going in the config.js:

CKEDITOR.editorConfig = function( config )
{
     CKEDITOR.config.toolbar_Basic = [
                  ['Source','-','Templates'],
                  ['Cut','Copy','Paste','PasteText','PasteFromWord','-','Print', 'SpellChecker', 'Scayt'],
                  ['Undo','Redo','-','Find','Replace','-','SelectAll','RemoveFormat'],
                  ['Checkbox', 'Radio', 'TextField', 'Textarea', 'Select', 'Button', 'ImageButton', 'HiddenField'],
                  '/',
                  ['Bold','Italic','Underline','Strike','-','Subscript','Superscript'],
                  ['NumberedList','BulletedList','-','Outdent','Indent','Blockquote'],
                  ['JustifyLeft','JustifyCenter','JustifyRight','JustifyBlock'],
                  ['Link','Unlink','Anchor'],
                  ['Flash','Table','HorizontalRule','Smiley','SpecialChar','PageBreak'],
                  '/',
                  ['Styles','Format','Font','FontSize'],
                  ['TextColor','BGColor'],
                  ['Maximize', 'ShowBlocks','-','About'],
                  ['insert_image']                                //Button added to the toolbar
                ]
 config.toolbar = 'Basic';
 config.extraPlugins = "insert_image”;   //registering the plugin
};

Tips:

If you don’t want to alter the default setup of the CKEditor toolbar or if you want to show or hide specific plugins on particular pages or just one page, you can do it by writing a few lines of code in the page where you want to make this happen.

For you to understand more clearly, let me give you an example, say I only want around 10 buttons to be displayed in the toolbar for a specific page called “test-editor.html”

&lt;script type="text/javascript"&gt;

var editor = CKEDITOR.replace( 'txtDescrip',    //var editor = CKEDITOR.replace( 'ID OF THE TEXTAREA', 
{
                toolbar : [
                         ['Source','-','Templates'],
                         ['Cut','Copy','Paste','PasteText','PasteFromWord','-','Print', 'SpellChecker', 'Scayt'],
                         '/',
                         ['insert_image']
                            ]
 });
&lt;/script&gt;

Using the above code and pasting it in the page where you want to change the look of the toolbar (hide or display a few of the buttons) will allow the page to only show those buttons or plugins which are mentioned in the code

Just to make it even more easier , here is the full code of the “test-editor.html”

&lt;!DOCTYPE HTML PUBLIC "-//W3C//DTD HTML 4.0 strict//EN"&gt;
&lt;html&gt;
&lt;head&gt;
&lt;title&gt;Truelogic.org::TestEditor::CKEditor example &lt;/title&gt;

&lt;script type="text/javascript" src="ckeditor/ckeditor.js"&gt;&lt;/script&gt;
 // do keep in mind the include path of the CKEditor folder on the web server or the local server

&lt;/head&gt;

&lt;body&gt;

 &lt;form name="" action="" method=""&gt;
 &lt;textarea id="txtDescrip" cols="20" rows="5"&gt; &lt;/textarea&gt;

&lt;script type="text/javascript"&gt;

 var editor = CKEDITOR.replace( 'txtDescrip',   //var editor = CKEDITOR.replace( 'ID OF THE TEXTAREA', 
 {
 toolbar : [
 ['Source','-','Templates'],
 ['Cut','Copy','Paste','PasteText','PasteFromWord','-','Print', 'SpellChecker', 'Scayt'],
 ['Undo','Redo','-','Find','Replace','-','SelectAll','RemoveFormat'],
 ['Checkbox', 'Radio', 'TextField', 'Textarea', 'Select', 'Button', 'ImageButton','HiddenField'],
 '/',
 ['Bold','Italic','Underline','Strike','-','Subscript','Superscript'],
 ['NumberedList','BulletedList','-','Outdent','Indent','Blockquote'],
 ['JustifyLeft','JustifyCenter','JustifyRight','JustifyBlock'],
 ['Link','Unlink','Anchor'],
 ['Flash','Table','HorizontalRule','Smiley','SpecialChar','PageBreak'],
 '/',
 ['Styles','Format','Font','FontSize'],
 ['TextColor','BGColor'],
 ['Maximize', 'ShowBlocks','-','About'],['insert_image'] ]
 });
&lt;/script&gt;

&lt;/form&gt;
&lt;/body&gt;
&lt;/html&gt;

Small Hints:

‘/’,

- this allows you to add a line break in the middle of the toolbar so that whatever plugin is written after this is displayed in the next line of the toolbar

‘-’

- this allows you to add a small gap between the buttons.
Like for example: the gap between ‘strike-through’ button and the ‘SubScript’ button

Preview of the CKEditor (default) Before adding the new plugin

CKEditor - default toolbar

Preview of the CKEditor (customized) After adding the new plugin

CKEditor - customized toolbar with new plugin

Preview of the textarea when the new plugin button has been clicked

CKEditor - when insert_image button has been clicked

Dec 18

Running multiple Firefoxes on one machine in Windows

Recently I was working on the designs of a few websites and I had come across an unusual new problem for me. I do know that different versions of Internet Explorers have different way of rendering the same HTML page and therefore look a lot different in different versions of IE.But now I also realized that in certain situations even different versions of Firefox also have this problem ( quite rare as compared to IE ) so now I had the need to install 2 different of Firefoxes on my machine to check the layout of a particular webpage design I was working on.Mozilla Firefox

So these are the simple steps to install as many Firefox as you want and run multiple instances of Firefox at the same time with different settings, add-ons etc. on a single machine (with Microsoft Windows operating system, in this case Windows XP SP2 )

Now let us start with the first Firefox installation – in this case I take Firefox version 3.5.5

When you start the installation, the folder which is the default folder is something like this

c:/program files/Mozilla Firefox” so do one thing, just create a separate folder for the particular version of Firefox you are installing, like for example

“c:/program files/Mozilla Firefox/ Firefox3x5″ and then continue your with the installation.

In the same way… now you have to install the next version of Firefox which may be any older version which in this case I choose as Firefox 3.0.8

so with the same procedure as above, I just change the installation folder to

“c:/program files/mozilla Firefox/Firefox3x0″ and complete the installation as you normally would.

Now that we have 2 different versions of Firefox installed on the same machine, we have to customize it in a way that both can run simultaneously without any problems.

For that we have to create separate individual user profiles so that we can handle the execution of 2 different Firefox versions.

To create the profiles in Firefox… go to command prompt or cmd , in the command prompt if the directory paht is not c: then change the directory path to c: by just typing c: in the comman prompt, which will change it from any other drive to c:  like this


changing the command prompt to c:

changing the command prompt to c:

and then after your in the c:>  write exactly like this

“c:PATH TO YOUR FIREFOX (ANY VERSION)Firefox.exe” –profilemanager

Now in my case , I had to write this in the command prompt

“C:Program FilesMozilla FirefoxFirefox3x5firefox.exe” –profilemanager


opening Firefox profile manager through command prompt

opening Firefox profile manager through command prompt

which will open a popup window something like this


Firefox profile manager popup screen

Firefox profile manager popup screen

Create at least 2 profiles for the 2 different versions you have on your machine. You can create as many profiles as you want according to the number of different versions which you want to run.

For example in my case I created one as “default” (which already exists but if you want to change it, you can name your profile anything u want) and the other as “arunace” now that you have created the profiles just click close or exit.

As there are 2 different versions so I will make respective shortcuts for each of them on my windows desktop, for example

For Firefox 3.5.5, I create a desktop shortcut and rename it as Firefox3.5

and for the other version of Firefox 3.0.8, I create a desktop shortcut and rename it as Firefox3.0

Now there is something you need to change in the properties of the shortcuts created, that is … go to the first shortcut like take Firefox3.5 for instance, do a mouse right click and go to its properties, change the target link to

“C:Program FilesMozilla FirefoxFirefox3x5Firefox.exe” -p default

-p means parameter which is passed with the target to specify which user is related to that particular shortcut and loads that user profile when you use that shortcut

the same goes for the next shorcut that is Firefox3.0 , got to its properties , change the target link to

“C:Program FilesMozilla FirefoxFirefox3x0Firefox.exe” -p arunace

which specifies that when I use the shortcut for Firefox3.0 , the user profile named “arunace” will be used .

Now one more thing which you have to fix is that … just add another parameter to one of the many shortcuts created in the target link to make it possible for the machine to run multiple instances of Firefox at the same time with different users and their settings , that is

“C:Program FilesMozilla FirefoxFirefox3x5Firefox.exe” -p default -no-remote

and now you can use 2 different versions of Firefox by just clicking the different shortcuts for the different versions you want to use on the same machine and at the same time.

Do let me know if there is any problem with these steps or if I can improve anything in this blog.

Good Luck !!!

Feb 18

How to enable hibernation on windows 7

Well I have been using Windows XP for a very long time now and I am quite happy with it. Even after when Vista was launched ,I kind of stuck with XP because I found Vista to be a real pain. Most of the things in Vista were quite complicated and for doing a very small thing we had to go through a lot of confirmations and pop-ups and screens which was quite annoying for a user sometimes.

Well then came windows 7 which I recently loaded onto my desktop just to try it out because I got good reviews from my friends and connections , I thought maybe I should give it a shot once . So after installing Windows 7 , I am quite satisfied with it till now . It works fine on my machine , it still has some complications for users like me who are very used to working on XP , but still a lot better than Vista by far .

Initially I found myself stuck with a small thing like changing the hibernate option settings on Windows 7 . I couldn’t find the way to enable the hibernate option as I easily did on XP  but after going through few options and settings I finally found the way  ,so just thought that I would put it up over the internet.

Steps to enable the hibernate option on Windows 7 :

1)

personalize

personalize

first just right click on the desktop and then click personalize in the menu list

2)

screensaver

screensaver

then click on the screen saver icon on the right-bottom corner of the window

3)

power option

power option

a window will open after you click on screen saver and on that there will be a text written as ” change power settings ” , click on it which will open another window

4)

select power plan

select power plan

now when you see a window like above , find the link given as ” change plan settings ” on the right side of the window , corresponding to the power plan currently being used for the computer (indicated on the left-middle side of the window with a highlighted radio-button)

5)

edit plan settings

edit plan settings

after that you will again see another window having a link given as ” change advanced power settings ” , click on that to manage the advanced power settings

6)

change advanced power settings

change advanced power settings

a small window will open with several options displayed as a list , from that list look for an option called ” sleep “, click on that option to expand it further for listing more options

7)

sleep

sleep

now you will see another extended option called “ allow hybrid sleep ” , click on it to display the options in it which will show setting as ” ON ” (default value) , now you just have to change it to ” OFF ” in the drop down box to enable the Hibernate option for your Windows.

8 )

hibernate after

hibernate after

now there are several other power options which can be changed , like for example there is an option called ” Hibernate After ” which is used to set the time duration after which the computer will go into hibernation automatically if no user is using the machine or no work is being done by the operating system (in this case Window 7)

You can set it in form of minutes like 60 mins or 120 mins or even 111 mins to be precise or you can disable automatic hibernation by choosing 0 (zero).

9)  When you are done with your settings , just click on the ” Apply ” button of the window to save your settings and then click Ok to confirm  - Or –   you can directly click on ” Ok ” button to save and confirm at the same time .

10)

hibernate enable

hibernate enable

now after changing the settings , when you go to the start menu , you will get see another option called hibernate in the shutdown button .

Well i started of from right clicking on the desktop and then navigated to the power options , to reach the power options window there is a another way to go through the control panel in the start menu .

control panel

control panel

here you will get to see a lot more options for you windows which are very useful , but right now we are going to look at the part of windows hibernation settings , so there is an option called “ Hardware and Sound “, click on it to go to the next window .

hardware and sound

hardware and sound

now on this window you will see the link ” Power Options “, clicking on which will go to the window which you see in the above stated step number (4) .

Well after that, all the steps from step (5) are the same .

Nov 26

Installing Apache 2.0.* with PHP 5.* in Windows

Much documented as the above process is, a lot of people still get stuck in some part of the installation process or the other (me included). It is not a complicated process really, its just that there are some simple tips and tricks which people have learned the hard way and these tips and tricks are often not available to the newbie installer.

Apache and PHP are softwares which are actually meant for *nix environments but a surprisingly large number of Windows developers use these platforms as a basis of all web development. Given below are the steps to get a successfull installation of Apache and PHP on Windows.

Why Apache 2.0 and not the latest Apache 2.2.3? Because as of this date, Apache 2.0 has some dll inconsistencies with PHP 5.x versions. PHP 5.2.0 has been released but I havent tried installing it with the latest Apache. Hopefully the problems of incompatibilities have been solved this time round.

1.Installing Apache 2.0

  1. Download the msi installer version of Apache 2.0. Its simpler to install from that than the zip installer
  2. For Windows machines which are running PWS or IIS, you need to turn off the WWW service before running the installer, because Apache defaults to using port 80 for HTTP and it wont start if it finds that port 80 is already in use.
  3. Run the msi installer
  4. Installing the Apache webserver is very simple. Simply follow the default installation screens and you are done.
  5. If all went well, then you will see the red Apache icon in your taskbar.
  6. To test if apache is running, open your web browser and type http://localhost or http://127.0.0.1 . You will see different pages in both the urls but it means your Apache webserver is up and running.

2.Installing PHP

  1. Unzip the php zip file to a folder of your choice.
  2. Thats it. PHP is installed. Simple, huh? Unfortunately you cant fire up your browser and see any php files running just yet. PHP need to be linked in with Apache before php pages start to run on your machine.

3.Changes to Apache 2.0 configuration

  1. Open up httpd.conf file in a text editor. This file exists in the /conf subdirectory of the folder in which Apache is installed.
  2. Do a text search for ‘AddType’. You will find lines which start with the AddType directive. After the last AddType line add these two lines:
    1. #php 5
    2. AddType application/x-httpd-php .php
    3. This tells Apache to handle php files as a registered application type.
  3. Do a text search for ‘DirectoryIndex’. Most likely this line will show as :
  4. DirectoryIndex index.html index.html.var
  5. This means that if a url does not specify a file, but only a folder, then the default page to load will be index.html. We want to change it so that it loads index.php when no file is specified. So change it to :
    DirectoryIndex index.php index.html index.html.var
  6. So now index.php becomes the default file for all directories.
  7. Do a text search for ‘LoadModule’ in httpd.conf. After all the LoadModule lines add the following line (assuming php is in c:php) :
    1. LoadModule php5_module c:/php/php5apache2.dll

4.Changes to PHP configuration

  1. Copy php.ini-dist in the php folder to php.ini. If php.ini-dist is not present, copy php.ini-recommended to php.ini.
  2. Open php.ini in an editor.
  3. Do a text search for ‘extension_dir’ . Most likely this line will show as
    1. extension_dir = “./”
    2. Change that to the complete path where the php extensions are present. Generally this is the ext folder under the php folder. So an example of this would be :
    3. extension_dir = “c:/php/ext”
  4. Do a text search for ‘Windows Extensions’. Once there, scroll down till you find the lines starting with extension= . If you plan to use mysql then uncomment the line extension=php_mysql.dll.
  5. If you want to run php with mysql then copy a file called libmysql.dll from the php directory to the Windows sytem folder i.e /System32.
  6. If you want to use the curl module then asuming you have uncommented the extension=php_curl.dll in php.ini , copy ssleay32.dll and libeay32.dll from the php directory to the Windows sytem folder (System32).
  7. Copy the updated php.ini file into the Windows folder i.e c:windows or c:winnt.
  8. Copy php5ts.dll from the php directory into the Windows system folder ie.System32

5.Test php with apache

Make a page called test.php with the following line:

phpinfo();

and save it in the Apache default website folder ie. the htdocs folder under the Apache folder.

Type http://localhost/test.php

If all has gone well, then you should see the page run.

Let me know if I missed out on something. I would be glad to incorporate your inputs to this blog